Chalk paint Easter eggs ideas
Last Updated on 29/02/2024
This page contains AFFILIATE LINKS. If you choose to purchase after clicking a link, we may receive a commission at no extra cost to you. Plus, as an Amazon Associate, we earn from qualifying purchases. Read more on the disclosure policy page.
Chalk paint eggs are an easy Easter DIY project that you can display on a pretty plate, or hang on bare branches with a minimalistic aesthetic. There are many ways to paint and decorate Easter eggs. From the traditional red dye or colorful options to more eccentric gold or marble effects, we can adjust Easter eggs and Easter decorations to express our style and aesthetics. And, there are many sources of inspiration for this like Pinterest boards or Youtube.


CREDIT: AMAZON
DIY Chalk paint Easter eggs
The materials that we will need for chalk paint Easter eggs are easy to find and use.
- eggs
- needle, or thin hand drill
- syringe
- paintbrush
- white chalk paint

Easter Chalk Paint Eggs steps
- This year I tried a very easy way to empty the eggs. Using a thick needle, I made two holes, one small on the top and one larger on the bottom. You can also use a thin hand drill. Then, I put in the small hole of the syringe (without the needle) and pressed it to blow out the inside in a bowl.
- I washed the inside with water. I cleaned up the outside with a wet cloth.
- Paint the egg! Whether you paint your eggs all white (my son covered his egg with all his white paint … we had to wait one whole day to dry…), or you want to make patterns and motifs, there are several choices according to your taste and your free time.
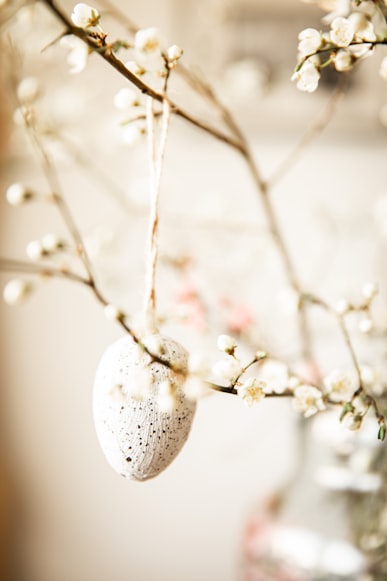
- When I finished the painting and let the eggs dry, I made some hangers with natural twine. The “secret” is to make a large knob fit in the hole. So, when I put the knob inside the egg hole, it couldn’t go out.
- And, to create a pretty spring and Easter decor, I decided to hang the new chalk paint eggs from some branches. I had gathered these branches and painted them the previous day. Moreover, we can decorate these branches with paper flowers and origami eggs.

CREDIT: AMAZON
More Easter egg ideas


CREDIT: AMAZON


This page contains AFFILIATE LINKS. If you choose to purchase after clicking a link, we may receive a commission at no extra cost to you. Plus, as an Amazon Associate, we earn from qualifying purchases. Read more on the disclosure policy page.
Advertisement

One Comment
time2lifestyle
Live this post!!!! Well done!!!